Experience your Sony TV flashing a red LED light repeatedly before shutting off? The 6-blink code often signals issues powering the backlight system or television components. Many instances can be resolved through simple troubleshooting before resorting to costly repairs. In this guide, I’ll draw on 20 years of appliance repair experience to break down common reasons a Sony TV blinks red light 6 times and proven methods to stop the warning.
- 6-blink code = backlight or power fault - Sony TVs flash the standby LED 6 times when the backlight strips or power supply board can’t deliver correct voltage
- Power cycling fixes ~30% of cases - unplugging for 60 seconds and holding the power button drains residual charge that causes false error states
- Blown fuses cost under $10 to replace - these are the most affordable fix and one of the most common failure points on Sony power boards
- Bulging capacitors are visually identifiable - swollen or leaking tops on capacitors confirm they need replacement, typically $5-15 in parts
- DIY repairs save $100-200 vs professional service - basic fixes like fuse and capacitor swaps require only a multimeter and soldering iron
#What Does the Red Light Blinking 6 Times Mean on a Sony TV?
Sony TVs utilize blink codes to self-diagnose internal hardware faults. The unit automatically flashes a standby red LED in a 6-cycle pattern to indicate problems powering on the backlight or television circuits.
The backlight refers to the LED lighting strips or CCFL tubes providing screen illumination. When those fail or don’t receive adequate voltage, the display remains black as a picture can’t be formed without lighting.
Meanwhile, the onboard power supply transforms high wall outlet AC into specialized low DC electricity that the TV components require. If that conversion fails, critical parts won’t receive the correct currents to operate normally.
So in summary – red standby LED flashing 6 times points to an inability for the TV to properly power up the backlights or internal electronics. The self-protection mechanism cuts off everything to avoid damage.
#What Causes a Sony TV Red Light to Blink 6 Times?
While the 6-blink code generally indicates backlight or power faults, many specific issues can trigger this warning. Based on repairing countless Sony TVs over the years, the most common culprits include:
-
Bad backlight LED strips – Faulty, burnt out or disconnected LEDs prevent adequate backlighting for the display.
-
Defective backlight inverter board – This specialized module drives the LED strips or CCFL tubes. When damaged, the backlights can’t activate.
-
Short circuit on a power rail – Internal shortage of positive/negative paths disrupts flow of safe operating voltages.
-
Blown fuses – These small replaceable fuses sacrifice themselves upon detecting abnormal current spikes.
-
Power surges – Local grid fluctuations frying components over time. Especially during storms.
-
Faulty ribbon cables – Fragile connectors between boards degrading, preventing proper communication.
-
Aging, bulging capacitors – These vital filters degrading, no longer capable of smoothing electricity.
-
Bad regulators ICs – Specialized chips that stabilize key voltages failing from heat/age.
-
Dust contamination – Buildup creating stray connections shorting tightly-packed circuits.
-
Physical damage – Drops/impacts during shipping or installation misaligning interior parts.
Fortunately, many common failures can be fixed with basic troubleshooting before replacing entire boards.
#How Do You Fix a Sony TV Blinking Red Light 6 Times?
Tip: Photograph key landmarks during disassembly to assist proper reassembly later
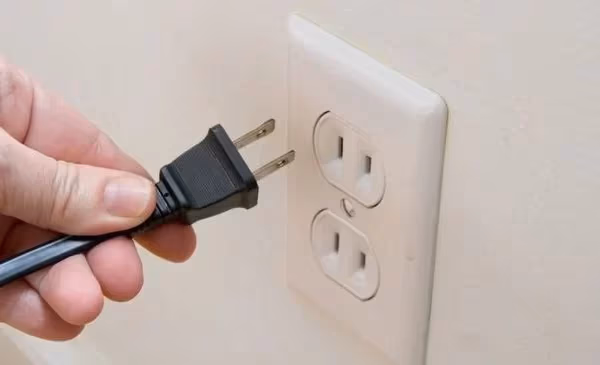
#1. Power Cycle the Television
Power cycling allows time for electricity to drain completely then reboot. This clearing of temporary memory anomalies resolves many electronics issues.
-
Unplug TV from outlet for 60+ seconds.
-
Press/hold power button 10-15 seconds to eliminate residual power.
-
Reconnect and turn on to observe if fixed.
Success rate: High for software issues. Essential first step.
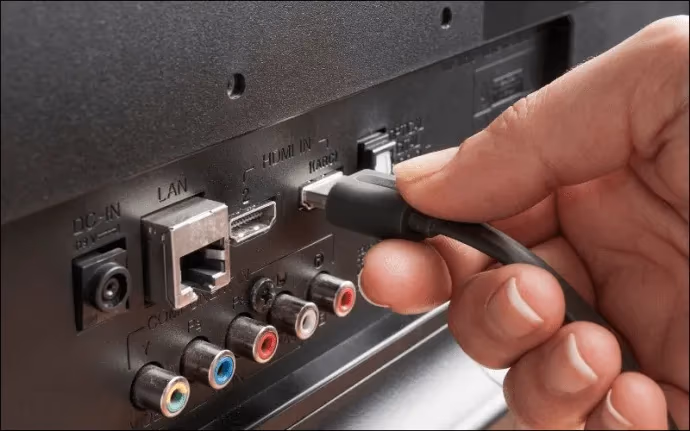
#2. Check All Wire Connections
Loose cables mimic catastrophic hardware damage. Eliminate this easiest possibility first:
-
Check snugness of all cable connections at the board and wall outlets.
-
Inspect wiring for any damage. Replace if compromised.
-
For wall mounts, ensure no crimping/pinching behind unit.
Consider bypass power accessories like strips/surge protectors that could be faulty.
#3. Attempt Different Power Sources
Determine whether TV powers on correctly using known good outlets. Narrow down whether electrical system or device side:
-
Connect TV directly into wall rather than power accessories first.
-
Try alternative outlets, rooms.
-
Test outlets with phone chargers to confirm functionality.
If TV works properly wall powered, investigate home electrical, cords and power accessories next. Add surge protection if local grid is unreliable.
#4. Reset System Management Processor
The main controller IC governs central operations like a small computer. Forcing reboot fixes freezes:
-
Locate CMOS reset jumper pins or tactile button on main board.
-
Momentarily bridge/press reset while powered.
-
Check if issue now resolved after restart.
Caution – Don’t disturb nearby components avoiding shorts
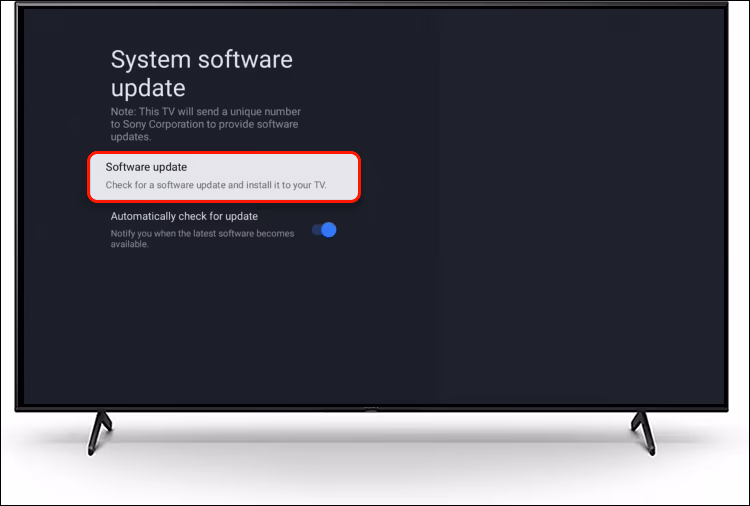
#5. Install Latest Firmware Update
While uncommon, outdated system software can potentially influence blinking issues. Updated code eliminates the possibility:
-
Navigate TV’s system update menu. Usually Support > Software Update
-
Download/install latest patch over internet if available. Requires WiFi connection.
-
Follow onscreen instructions and keep TV powered during process.
-
Hard reboot after successful update to load new firmware.
Heads up – internet connection required for over-the-air updates
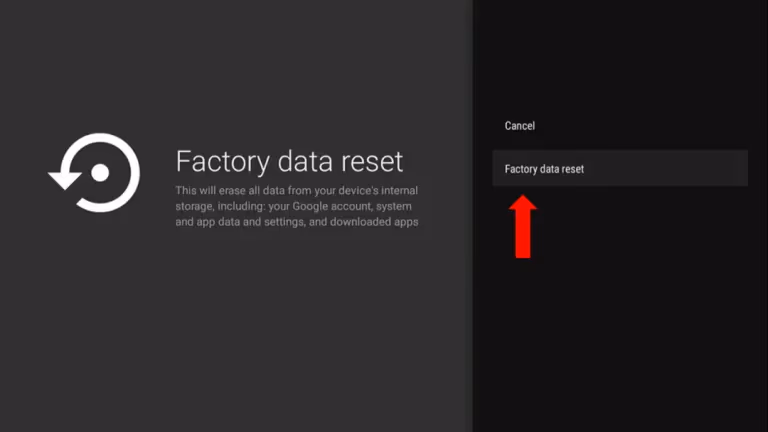
#6. Factory Reset Settings
If modifications to picture modes are contributing, this erases those customizations:
-
Access master Factory Reset menu. Typically Support > Initialize > Factory Data Reset.
-
Confirm initialization prompt to wipe all channels/apps/accounts/preferences.
-
Wait out reboot into initialization at first-use.
-
Retune channels afterward.
Tip: Document customized settings to easily reconfigure later
#7. Inspect/Substitute Backlight LED Strips
These LED strips provide the key backlighting for the liquid crystal display. Failure = no video displayed:
Checking Existing Strips
-
Pry open outer bezel to carefully expose strips. Avoid panel damage.
-
Check for cracks/corrosion and ensure secure connections.
-
Use a multimeter to check voltage. Zero voltage means issues powering them.
Replacing Strips
-
Buy same number/size replacement LED strips for panel.
-
Gently remove old strips from adhesive backing.
-
Mount substitute strips into same ports.
-
Test function by powering up TV.
Warning – Don’t operate strips outside the TV; instant burnout risk.
#8. Resolder/Substitute Backlight Fuses
The easily replaceable fuses blow themselves rather than allowing catastrophic failure from spikes. But blown fuses render attached components inoperable.
Finding Blown Fuses
-
Probe power board fuses for continuity issues using a multimeter or visual scorching to identify damaged ones.
-
Make note of which specific fuses failed before obtaining replacements.
Fixing issues
To replace
- Carefully desolder and replace failed fuses with identical amperage versions using solder wick and heat gun.
To resolder
-
Reflow each desoldered fuse’s mounting joints with minimal flux and ~750°F heat.
-
Confirm no cold joints before reconnecting power.
Warning – Don’t bypass fuses. Doing so will certainly cause severe damage.
#9. Replace Degraded Capacitors
Aging capacitors lose ability to evenly smooth electricity delivery over time, resulting in no power or blinking lights. Bulges, leaks or popped tops confirm failure.
Finding Bad Capacitors
-
Scan tops and bottoms of capacitors for electrolyte leaks/bulges/venting damage.
-
Use a multimeter to check for continuity confirming short circuit failure.
-
Note exact failed ones before obtaining replacements.
Swapping Capacitors
-
Carefully desolder and detach failed units.
-
Solder-in identical capacitance microFarad replacements respecting polarity.
-
Clean up any leaked electrolyte with isopropyl alcohol.
Consider proactive full capacitor bank replacement for improved longevity
#10. Substitute Backlight Inverter Board
Driving the CCFL tubes or LED arrays, this specialized inverter transforms low voltage to high-frequency lighting current. Damage prevents backlights powering on.
Diagnosing Issues
-
Check input/output voltages with a multimeter while powered on.
-
No input voltage points to external wiring faults. No output means failed inverter.
Replacing Inverter
-
Obtain an inverter compatible with the TV’s backlight specifications.
-
Disconnect all wires and connectors before unscrewing old board.
-
Install replacement ensuring correct reattachment of all wiring.
Caution – CCFL tubes generate high voltage. Don’t operate outside of metal housing.
#11. Replace Faulty Power Supply
Transforming AC inlet power into DC levels for components, failures disrupt delivery of standby/operational voltages.
Testing Power Supply
-
Probe major power rails to check for expected standby and operating voltages vs specifications using multimeter.
-
Visually inspect for damaged parts like shorted transistors or blown fuses. Replace if observed.
Replacing Power Supply
-
Obtain equivalent power supply board for TV model and region. Can be third-party.
-
De-solder connector wires and mounting posts, then transfer to replacement board.
-
Install new board carefully, ensuring no pinched internal cables.
Tip: Note wire colors and unique connections to simplify reassembly
#12. Initiate Self-Diagnostics Through Hidden Service Menu
Advanced troubleshooting modes provide debug codes pointing to specific faulty components the menu system detected.
Accessing Service Menu
-
Button sequences to enter vary – 10 power button presses, Mute + 1+3+5 numeric keys etc.
-
Consult model-specific sequence online if unsure.
Once Service Menu Active
-
Navigate to self-check, error code logs or board voltage measurements.
-
Research any hardware fault codes noted to pinpoint failures.
-
Clear correctable memory errors after resolving to dismiss false positives on next boot.
Warning – Don’t adjust values without guidance. Potential to disable functionality.
#13. Eliminate Connected Devices as Potential Culprit
While less likely, problematic inputs like a faulty Roku streaming stick blinking white can potentially trigger cascading TV errors including standby blinking when both powered on.
-
Unplug all external devices like Blu-ray players, streaming sticks, cable boxes.
-
Directly power on TV to determine if issue persists when nothing else connected.
-
If problem disappears, investigate wiring and condition of ancillary devices next.
#Bottom Line
Start with the free fixes: power cycle, check cables, and try different outlets. If those don’t work, open the back panel and look for visually obvious damage like bulging capacitors or scorched fuses. These parts cost under $30 and most people with basic soldering skills can swap them. For anything involving the backlight inverter or full power supply board, weigh the repair cost against a replacement TV, especially if your set is more than 5-6 years old.
#FAQ
#Why does my Sony TV randomly turn off and flash the red light 6 times?
The 6-blink pattern means the TV detected a fault in the backlight circuit or power supply. Its built-in protection shuts everything down to prevent further damage when it can’t power the screen properly.
#How much does it cost to fix a Sony TV with the 6 blink error?
Repairs range widely depending on the failed component. A blown fuse runs about $10. New capacitors cost $15-30. Backlight LED strip or power supply board replacement can reach $100-150+ including labor if you hire a technician.
#What are the most common fixes for the red light blinking 6 times?
Power cycling, cable inspections, fuse replacements, and capacitor swaps solve the majority of cases. Firmware updates and factory resets occasionally help with software-related triggers. Board replacements are a last resort for persistent hardware faults.
#Why does my Sony TV still blink 6 times after replacing boards?
Underlying wiring faults or unstable voltages from the wall outlet may be damaging new boards prematurely. Check all ribbon cable connections, verify voltages at each power rail with a multimeter, and confirm your outlet delivers stable power.
#Is it safe to repair the 6 blink error myself?
Basic checks like reseating connections and inspecting for bulging capacitors are safe for most people. Internal soldering and board replacement carry electrical risk, so hire a licensed repair technician if you’re not comfortable working around high-voltage components.
#Can a power surge cause the 6 blink error on a Sony TV?
Yes. Voltage spikes from lightning storms or unstable grid power can blow internal fuses and damage capacitors. Plugging your TV into a quality surge protector helps prevent this type of failure.
#Does a factory reset fix the Sony TV 6 blink code?
A factory reset only helps if the blinking is triggered by a software glitch rather than a hardware fault. In most cases the 6-blink code points to a physical component failure, so a reset alone won’t resolve it. Still worth trying before opening the TV since it takes just a few minutes.