Kodi is one of the most popular media center apps for streaming movies, TV shows, and live sports on various devices. Many users run into problems getting it to work on the Amazon Fire TV Stick, though. This guide covers the top reasons behind the “Kodi not working on Fire Stick” error and walks you through fixes to get streaming again.
- Outdated Kodi or Fire OS versions cause most crashes and compatibility failures on Fire TV Stick
- Clearing cache and data through Fire TV settings resolves erratic behavior without losing your setup
- Third-party add-ons are the leading cause of Kodi instability and should be removed first when troubleshooting
- A stable Wi-Fi connection of 15-20 Mbps is the minimum needed for buffer-free HD streaming through Kodi
- Factory reset is the last resort that fixes deeply rooted software conflicts when other steps fail
#What Causes Kodi Issues on Fire TV Stick?
Before jumping into solutions, you should know what’s causing Kodi to malfunction in the first place.
#Outdated Software
Like any app, Kodi requires routine updates to fix bugs, patch security flaws, and maintain compatibility with new operating systems and hardware. Using an outdated version of either Kodi or the Fire TV Stick system software is a recipe for issues.
#Overloaded Device Storage
The Fire Stick has limited onboard storage, and filling it up with apps and cached video files can cause slowdowns and crashes. Kodi may start misbehaving if storage space gets critically low.
#Problematic Add-ons
One of Kodi’s main appeals are the thousands of community-built video add-ons that provide free access to movies and shows. However, many of these add-ons are buggy, break often, and can even contain malware.
#Intermittent Internet Connectivity
Streaming high-definition video requires a fast, reliable broadband connection. Any hiccups or interruptions with your home Wi-Fi network will disrupt Kodi streams.
#ISP Throttling
Some internet providers deliberately slow down traffic from streaming platforms like Kodi. A VPN can bypass these throttling measures.
#How Do You Fix Kodi Not Working on Fire TV Stick?
Now that we know why Kodi has problems, let’s walk through solutions to get it back up and running on your Fire TV Stick.
#1. Check Internet Connection Strength
Verifying Wi-Fi signal strength is always the first troubleshooting step. Underpowered signals lead to buffering and connectivity problems. Open Fire TV settings and run the “Check Network” and speed test functions.
-
Target at least 15-20 Mbps speeds for smooth HD streaming.
-
Move Fire Stick closer to router if signal is weak.
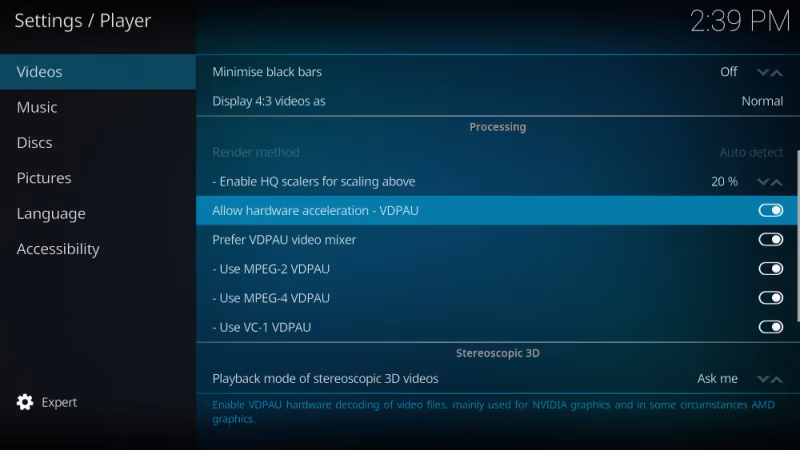
#2. Disable Hardware Acceleration
Turning off video hardware acceleration reduces system resource load. This can resolve instability and crashing issues.
- Kodi Settings > Player > Uncheck “Allow hardware acceleration”
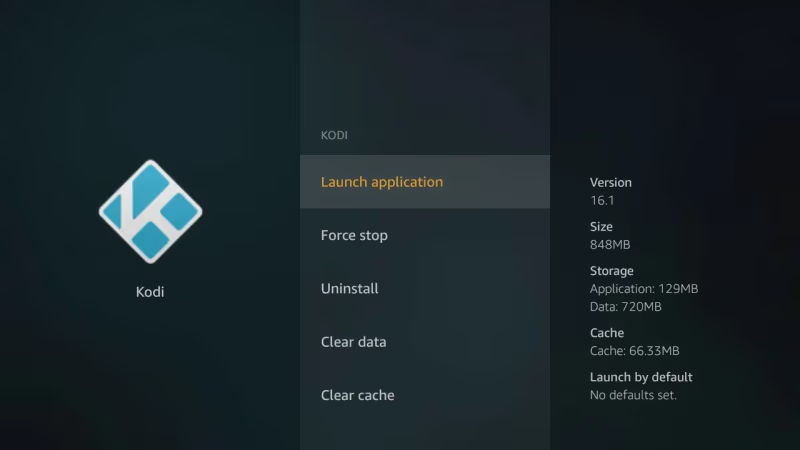
#3. Clear App Cache and Data
Cached video buffers and corrupted data files cause erratic behavior. Wiping them restores normal operation.
- Fire TV Settings > Applications > Manage Applications > Kodi > Clear Cache + Clear Data
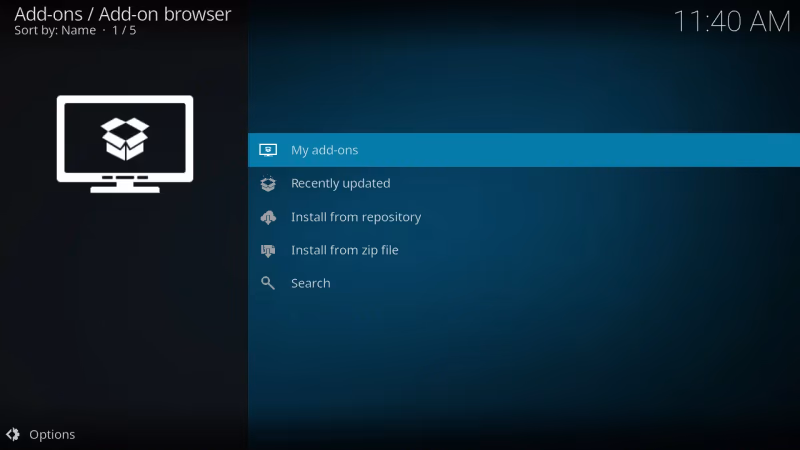
#4. Remove Problematic Third-Party Add-ons
Dodgy plugins from unknown developers are a leading cause of Kodi failures on Firestick. Delete any suspect add-ons. For users having continued issues getting Kodi to run well, check out some of the best Kodi alternatives like Plex, Emby, and Stremio.
- Kodi Home Screen > Add-ons > My Add-ons > Uninstall from context menu
#5. Reset Kodi to Default Settings
If mutations to Kodi’s settings have led to problems, resetting everything brings it back to a clean working state.
- Kodi Home Screen > Settings Icon> File Manager > Profile Directory > Database > Delete files

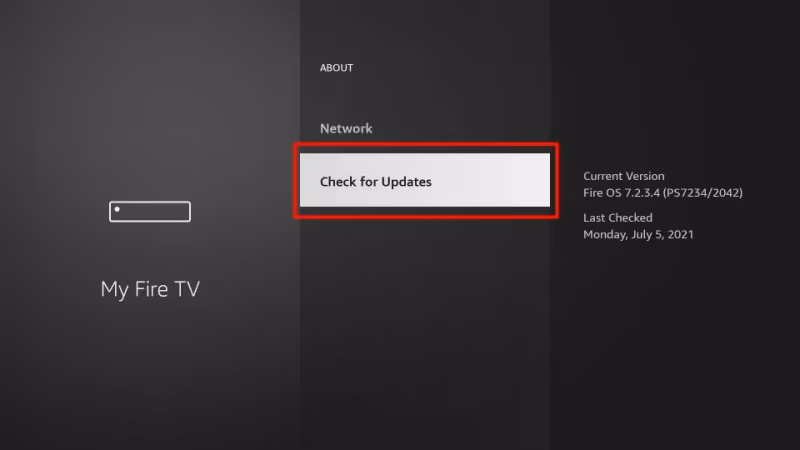
#6. Update Kodi and Fire OS Software
Staying current with the latest releases prevents version compatibility issues and fixes lingering bugs.
-
Kodi Settings > About > Check for Updates
-
Fire TV Settings > My Fire TV > About > Check for Updates
#7. Use a Fast DNS Service Like Google DNS
Your ISP’s DNS servers can suffer slowdowns or caching problems that disrupt stream requests. An alternative DNS provides a fast, reliable lookup service.
- Fire TV Settings > Network > DHCP/Change to Static > Enter 8.8.8.8 and 8.8.4.4 DNS addresses

#8. Hook Up an External Streaming Device
Underpowered hardware like the Fire Stick often struggles with HD streaming. Connect an NVIDIA Shield, Roku Ultra or Apple TV 4K instead. These devices run Kodi far more smoothly.
#9. Expand Internal Storage with a USB Drive
If your Fire device storage is completely full, plugging in an external USB flash drive or hard drive via OTG cable provides breathing room.
#10. Use a Fast VPN Service
VPN encryption shields your streaming activity from ISP throttling. It also circumvents geo-restrictions to open more Kodi add-on content options. We recommend ExpressVPN.
#11. Add Source Refresh Shortcuts
Manually forcing Kodi to scan for updated repository files prevents issues with broken sources.
- Add Source > Enter URL > Long press > Assign Refresh Shortcut
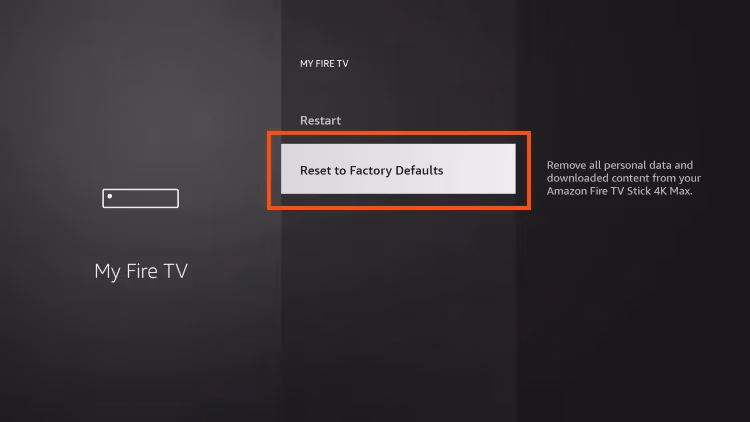
#12. Factory Reset Fire Stick
When all else fails, a total factory reset erases any deeply rooted software gremlins causing Kodi grief. You’ll have to reinstall apps and reconfigure settings after wiping the device.
#Bottom Line
Getting Kodi up and running smoothly on underpowered streaming sticks takes a little tweaking. Here are the core tips to remember:
-
Keep software updated
-
Clear app cache/data periodically
-
Stick with official Kodi add-ons
-
Use a VPN to prevent throttling
-
Factory reset if issues persist
Investing in a faster streaming device also alleviates many performance-related headaches. The NVIDIA Shield handles Kodi without the lag or crashes that plague the Fire TV Stick.
Finally, realize that some problems arise from Kodi scrape sources going down temporarily. Have patience and try again later before troubleshooting extensively. Users report better scraping success and stability with alternate apps like Stremio and Jellyfin.
#Frequently Asked Questions
#Does clearing cache fix Kodi on Fire TV Stick?
Yes, clearing cache and data forces Kodi to re-scan all media sources and resets add-on configurations. This fixes most crashes, freezing, and playback errors without requiring a full reinstall. Go to Fire TV Settings > Applications > Manage Applications > Kodi > Clear Cache, then Clear Data.
#Can you run Kodi without an internet connection?
Kodi needs an internet connection for streaming from online sources. You can play locally stored media files over USB or network-attached storage without Wi-Fi, but most add-ons require an active broadband connection to function.
#Is the Fire TV Stick 4K better for running Kodi?
The Fire TV Stick 4K has more RAM and a faster processor than the standard model, which makes a noticeable difference with Kodi. Expect fewer crashes, faster menu navigation, and smoother 1080p and 4K playback. If you stream regularly through Kodi, the 4K model is worth the upgrade.
#Does using a VPN slow down Kodi streams?
A VPN adds encryption overhead that can reduce speeds by 10-20% on most connections. On an already slow network, this may cause buffering. Pick a VPN server geographically close to you and use the WireGuard or Lightway protocol for the best balance of speed and privacy.
#Is Kodi legal to use?
Kodi itself is open-source software released under the GPL license and is completely legal. Third-party add-ons that provide access to pirated movies or TV shows violate copyright laws. Stick with official Kodi add-ons from the repository to stay on the right side of the law.
#Why does Kodi keep crashing on my Fire TV Stick?
Frequent crashes usually point to low storage space, a broken add-on, or an outdated Kodi version. Remove any recently installed third-party add-ons first, then clear the app cache. If crashes continue, uninstall Kodi completely and reinstall the latest version from the official site.
#How much storage does Kodi need on Fire TV Stick?
Kodi itself takes about 200 MB, but cached thumbnails, metadata, and add-on data can push that past 1 GB over time. Keep at least 500 MB of free space on your Fire TV Stick for stable performance. Clear the Kodi cache periodically or move data to a USB drive via OTG cable.